You do not need a mansion, a giant material farm or a complicated tutorial to make a Minecraft house you actually enjoy returning to. A small home becomes memorable when its roof, entrance and surroundings work together. This guide gives you 25 easy Minecraft house ideas, from a first-night cabin to a compact modern home, with a usable footprint and a clear way to start each one.
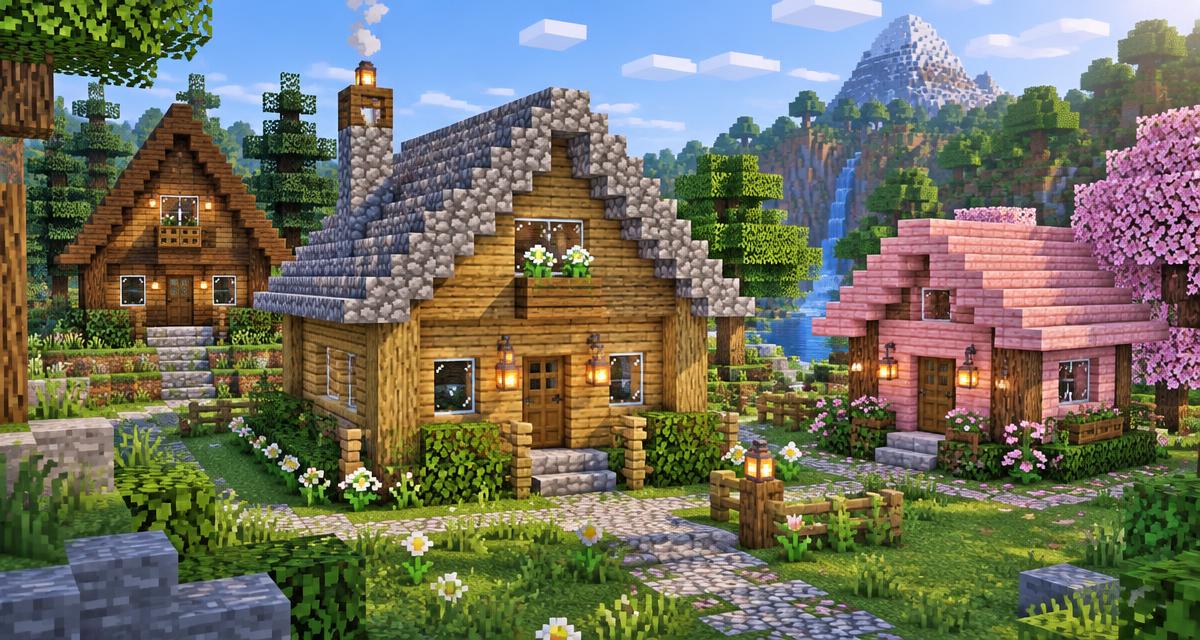
These are original, adaptable layout suggestions rather than copies of named creators' builds. Dimensions describe the outside wall footprint unless a deck or attachment is explicitly included. A one-block-thick rectangular wall removes two blocks from each interior dimension: a 7×9 shell has a 5×7 interior. The generated cover is inspiration, not an exact blueprint for the dimensions below. Material quantities depend on windows, roof pitch and terrain, so use the House Planner to sketch your final layout instead of treating the palettes as shopping lists.
Choose your house: a quick beginner shortlist
- First-night survival: 1. Oak starter cottage, 2. Cobblestone cabin, 3. Hillside shelter, 4. Tiny 5×5 house, 5. Expandable rectangle.
- Cozy woodland builds: 6. Spruce A-frame, 7. Birch garden cottage, 8. Cherry cottage, 9. Lakeside cabin, 10. Small tree platform house.
- Food and practical storage: 11. Farmhouse, 12. Fisherman's hut, 13. Workshop home, 14. Two-story starter, 15. Courtyard house.
- Biome-inspired homes: 16. Desert sandstone house, 17. Savanna acacia house, 18. Snowy stone lodge, 19. Bamboo bungalow, 20. Mud-brick cottage.
- More distinctive shapes: 21. Modern box house, 22. L-shaped home, 23. Mini watchtower house, 24. Hobbit-style hill house, 25. Starter home with a greenhouse.
Before building: a simple plan that prevents rebuilding
Pick level ground near the resources you already use. Clear enough room for the building plus a path, a small farm and future expansion. Mark the outside corners with temporary blocks, then walk through the imagined interior. If your chest, bed and furnace would all block the doorway, enlarge the footprint now rather than after you have built the roof.
- Choose one main wall block, one contrasting frame block and one roof block. Oak planks, oak logs and cobblestone are enough for a complete cottage.
- Place the floor and reserve the door opening. Start ordinary room walls three blocks high above the floor so the ceiling does not feel cramped.
- Add windows only after locating the bed and storage. Keep a solid wall where you want stacked chests or a furnace bank.
- Close the roof and light the interior before decorating. Check nearby caves, dark corners and accessible roof surfaces as well as the room itself.
- Add the bed, crafting table, furnace and chests. Finish the path and garden last, then keep a spare wall available for your next room.
These ideas do not need mods, commands or redstone systems. Most palettes use long-established blocks. Cherry and bamboo wood sets were added in 1.20, while mud and mud bricks arrived in 1.19; substitute your local wood or stone if your world is older. For material background, consult the Minecraft Wiki cherry reference, bamboo block reference and mud-brick reference.
1. The 7×7 oak starter cottage
Best for: a first permanent survival base. Outside footprint: 7×7, with a 5×5 interior. Palette: oak planks, oak logs, cobblestone stairs, glass panes and torches. This is the reliable all-rounder: one room, common materials and a roof that gives it more character than a plain box.
- Mark a 7×7 square, lay the floor and raise the corner log posts. Fill the walls to three blocks above the floor, leaving a centered doorway and small windows.
- Run two sloping rows of roof stairs toward a ridge, extending the eaves one block past the side walls. Fill the triangular end gaps with planks.
- Put the bed against one wall, storage opposite it and crafting beside the entrance. Leave a clear central aisle instead of filling every floor tile.
Make it your own: add two fence-post porch supports and a short path. Expand later with a storage room behind the back wall; the original entrance and roof can stay intact.
2. The sturdy cobblestone cabin
Best for: players coming home with more stone than wood. Outside footprint: 7×9, with a 5×7 interior. Palette: cobblestone, oak planks, oak stairs and glass. The narrow rectangle gives you room for separate sleeping and crafting corners without introducing a second floor.
- Build a cobblestone foundation and three-block-high stone walls. Use oak around the entrance and windows to break up the gray surface.
- Place an oak gable roof with its ridge running along the long dimension. Keep the same stair direction on each slope and cap awkward gaps with slabs.
- Arrange storage along a long wall and put the bed at the far end. Light both ends rather than relying on a single entrance torch.
Make it your own: replace a few cobblestone patches with stone or stone bricks for texture. Stone is useful around fire, but it does not make the house creeper-proof; keep the approach visible and check before opening the door.
3. The quick hillside shelter
Best for: getting indoors before the first night. Interior target: 5 blocks wide, 5 deep and 3 high, carved into a hill; the terrain supplies the outer shell. Palette: existing stone or dirt, a wood doorway, torches and an optional plank floor. This is the lowest-resource idea because you are excavating a room rather than building every wall.
- Choose a broad hill face and dig a small room, checking for caves or exposed openings as you go. Leave a solid ceiling and avoid cutting straight up into loose gravel or sand.
- Frame the entrance with logs or cobblestone, install a door and light the inside. Patch any holes that connect your room to unlit terrain.
- Place crafting and storage near the front, with the bed farther back. Add a short path so the doorway is easy to find from outside.
Make it your own: replace the front face with a neat stone arch after you are settled. Expansion is straightforward: dig another room sideways while keeping enough solid material between rooms and the hillside surface.
4. The tiny 5×5 survival house
Best for: a temporary camp or travel outpost. Outside footprint: 5×5, leaving a tight 3×3 interior. Palette: any planks, slabs, a door and a few torches. Small does not mean roomy: plan the furniture first and do not expect a full storage system to fit.
- Lay the floor and build three-block-high walls. Put the doorway at the front and a small window opposite it.
- Cover the room with a simple slab roof. Use a one-block overhang where the surrounding space allows, then check the roof and nearby ground for dark spawnable areas.
- Keep a two-block-long bed along one side and the crafting table, furnace and single chest along the other. Maintain a usable route from the entrance.
Make it your own: add a sheltered outside crafting area instead of squeezing in more furniture. When you outgrow it, keep this house as a mining outpost or guest cabin rather than demolishing it.
5. The expandable rectangular starter
Best for: players who want one home that grows with them. Outside footprint: 7×11, with a 5×9 interior. Palette: local planks, matching logs and a contrasting stair roof. A longer rectangle costs more than the tiny starter but avoids an early move when storage starts filling.
- Mark three zones inside the long room: entrance and crafting, storage in the middle, bed at the back. Build the shell around those zones.
- Use a single straight gable roof rather than intersecting roof sections. Keep one long wall simple, without expensive windows or a fireplace.
- Add an exit or temporary plank panel in that plain wall. Later, replace it with the doorway into a dedicated enchanting or storage wing.
Make it your own: use repeated window spacing and matching corner posts so additions look planned. Sketch the future wing in the House Planner before changing the roof.
6. The spruce A-frame cabin
Best for: a cozy forest or mountain base. Outside base footprint: 9×9. Palette: spruce planks, spruce stairs, stripped spruce logs and cobblestone. An A-frame gets most of its identity from the tall triangular roof, which narrows usable headroom toward the sides.
- Build the floor and a low stone or log base. Mark the front and back center points so both roof ends meet at the same ridge.
- Raise matching stair slopes from the two sides, stepping inward as they rise. Leave enough central height to walk through the main room; fill the front and back triangles with planks.
- Center the doorway and place a window above it. Keep the bed and storage near the side walls and the walking route beneath the tallest part of the roof.
Make it your own: extend a small porch at the front. Do not add an attic until the main room works; many beginner A-frames become awkward because the upper floor steals the usable headroom below.
7. The birch garden cottage
Best for: a bright, simple woodland home. Outside footprint: 7×9. Palette: birch planks, stripped birch logs, a darker spruce roof and leaves. The contrast between pale walls and dark roofing does the decorative work, so you can keep the shape uncomplicated.
- Build a rectangular birch shell with log corner posts. Leave two balanced front windows and a doorway between them.
- Add a spruce stair roof with a one-block overhang. Keep the roof outline consistent rather than mixing several roof block types.
- Reserve one side of the house for storage and put the bed beside the rear window. Add flower beds outside, keeping the entrance and windows unobstructed.
Make it your own: run a short hedge along the path and use fence gates for the garden entrance. A garden looks finished with just a few repeated plants; you do not need to collect every flower type.
8. The small cherry cottage
Best for: a cute home near a cherry grove. Outside footprint: 7×7. Palette: cherry planks and stairs, stripped cherry logs, glass panes and cobblestone or stone bricks. The pink walls are already a focal point, so use a restrained foundation and avoid adding too many competing colors.
- Lay a stone foundation and frame a three-block-high cherry wall shell. Keep the doorway visible between small front windows.
- Build a cherry stair roof or contrast it with darker wood that is available nearby. Add slabs to smooth the ridge and eaves.
- Use a simple bed-and-storage arrangement inside. Place flowers beside the entrance rather than covering the entire facade with leaves.
Make it your own: add a tiny tea-garden-style patio using slabs and stairs as decorative seating. Cherry building blocks need 1.20 or newer; a birch-and-flower variation gives older worlds a similar light cottage feel.
9. The lakeside deck cabin
Best for: a relaxing base beside a lake. House footprint: 7×9, plus a separate 3×7 shoreline deck. Palette: spruce or oak, logs, fences and stone stairs. Building beside water is much easier than building underwater, while the deck supplies a distinctive silhouette.
- Put the main cabin on dry ground above the waterline. Build a normal three-block-high shell and gable roof before extending over the shoreline.
- Run the deck along the water-facing side, adding support posts where needed for the appearance. Fence exposed edges but leave a deliberate access point.
- Place the storage wall inland and larger windows toward the lake. Add steps down to a boat landing rather than a steep drop directly into water.
Make it your own: add two dock posts and a small outdoor seating area. Expand inland first; a larger water platform can wait until you have spare wood and a safe working position.
10. The small tree platform house
Best for: a playful forest hideaway. House footprint: 7×7 on a larger 9×9 platform around or beside a sturdy tree. Palette: local logs, planks, fences and ladders. Keep the platform low enough that mistakes are manageable; a towering jungle tree is not the easiest place to learn.
- Choose a tree and build a platform without relying on leaves as your permanent floor. Add log support columns or beams for a convincing structure.
- Build the small cabin on the platform, leaving a fenced walkway outside. Close any gaps between the trunk and the floor.
- Add a ladder or staircase, light the access route and fit a trapdoor or controlled entrance. Keep the sleeping area clear of the trunk and low branches.
Make it your own: wrap a balcony around one side and hang lanterns from support beams when you can craft them. Elevation alone is not a complete safety system: light the platform and protect the edges from falls.
11. The compact farmhouse
Best for: survival worlds where food comes first. House footprint: 7×9, with a separate crop plot beside it. Palette: oak, cobblestone, fences and an optional hay-bale accent. The farm makes the build useful immediately, and a simple porch ties the home and field together.
- Build the rectangular house with a porch facing the future field. Place the furnace, crafting table and food chest near this entrance.
- Mark a small crop area outside and add a water source where it can hydrate the farmland. Keep a walkway between the field and house so the garden does not block the doorway.
- Fence the field and add a gate aligned with the path. Finish the roof before adding a barn or animal pen.
Make it your own: create a separate produce chest and composting corner. Leave room beyond the field for animals or a second crop patch instead of surrounding the starter house with buildings on day one.
12. The fisherman's hut
Best for: a small waterfront outpost. House footprint: 5×7, plus a 3×5 dock. Palette: oak or spruce planks, logs, slabs, fences and barrels or chests. The hut is intentionally small; most of its character comes from the dock and waterside approach.
- Build the hut at the edge of solid ground and keep the bed against the back wall. Use a compact roof with a small overhang.
- Add a dock from the entrance toward open water. Place fences at exposed sides and keep a clear spot for entering or leaving a boat.
- Add storage near the doorway for fishing supplies and travel items. Light the dock as well as the interior.
Make it your own: create a roofed dock section or decorative nets using carefully placed fence and trapdoor details. This is an ordinary home and fishing spot, not a promised automatic or treasure-fishing farm.
13. The workshop home
Best for: players who craft and sort more than they decorate. Outside footprint: 9×9, leaving a 7×7 interior. Palette: stone or cobblestone at the base, planks above, logs and a simple stair roof. This larger single room is easier to use than a tiny house divided into too many compartments.
- Build a square shell and leave one long uninterrupted interior wall for storage. Put windows on the other walls instead.
- Arrange crafting and furnaces in a work zone near the entrance. Keep the bed in a quieter corner and leave a central walking area.
- Install labeled storage and make sure chest lids have clearance. Add advanced stations only when you have the resources and enough free wall space.
Make it your own: add an outside smelting porch, or plan a separate storage room with the Storage System Planner. If you later automate sorting, use our item sorter guide instead of assuming a row of hoppers can sort everything by itself.
14. The two-story starter house
Best for: gaining space on a small plot. Outside footprint: 7×9 on each floor. Palette: cobblestone lower walls, plank upper walls, matching logs and stairs. Two floors let you separate work and sleep, but the staircase consumes some of the additional space.
- Mark the staircase position before completing the lower floor. Build the ground-floor walls three blocks high, then place the upper floor above them.
- Build another three-block-high room above and add a straight gable roof. Leave enough opening over the stairs to walk up without hitting your head.
- Keep crafting and bulk storage downstairs, with the bed and smaller personal storage upstairs. Light both rooms and the staircase.
Make it your own: add a small front balcony supported by logs. If the stairs feel too cramped, enlarge the shell to 9×9 or use a ladder for a temporary loft rather than forcing an unusable staircase.
15. The courtyard starter house
Best for: a base with outdoor crafting or a garden. Overall planned footprint: 11×11, containing a 7×7 enclosed house at the rear and a shallow courtyard at the front. Palette: local planks, stone, fences and slabs. The yard makes the small room feel like part of a bigger property without requiring a second enclosed wing.
- Build the enclosed house first, with its doorway facing the yard. Keep the bed and valuables indoors.
- Use a low wall or fence to define the front courtyard and add a gate aligned with the door. Preserve a clear path through the middle.
- Place a small planter or outdoor workstation to one side. Light the entire yard and avoid decorative blocks that create an easy step over the boundary.
Make it your own: add a slab canopy over one work corner. A courtyard is not automatically safe because it has a wall: check entrances, nearby slopes and dark ground before treating it as a protected workspace.
16. The desert sandstone house
Best for: an early desert base with limited local wood. Outside footprint: 7×9. Palette: sandstone, cut sandstone, sandstone slabs and any wood for the door and furniture. A flat roof and recessed windows fit the setting while avoiding a large supply of wooden roof stairs.
- Lay a sandstone floor and build three-block-high walls. Use cut sandstone selectively around the entrance to add detail.
- Close the roof with slabs or blocks and add a low decorative rim. If the roof is accessible, provide a safe route up and check its lighting and spawnable surfaces.
- Recess windows one block where your wall design allows, or use a small slab shade above them. Arrange the bed away from the entrance and keep a travel chest near the door.
Make it your own: add a shaded porch and a small water garden. Sandstone is a building block; loose sand is not a substitute for unsupported ceilings because it falls when unsupported.
17. The savanna acacia house
Best for: using the wood already around a savanna spawn. Outside footprint: 7×9. Palette: acacia planks, acacia logs, cobblestone and a low slab roof. Orange planks and gray log bark create a strong contrast without requiring imported materials.
- Build a low cobblestone foundation, then add acacia log corners and plank walls. Keep the front opening broad enough for a visible entry.
- Use a shallow roof with a one-block shade overhang. Repeat the same roof height around the building so it looks intentional.
- Place a small porch or fenced patio on one side. Keep the main room open, with storage against the rear wall.
Make it your own: alternate a few log and plank panels rather than covering every wall with orange. Acacia is the theme, not a rule; substitute oak for the furniture or roof trim if it is easier to gather.
18. The snowy stone lodge
Best for: a winter-looking home near spruce forests. Outside footprint: 9×9. Palette: cobblestone or stone bricks, spruce logs, spruce planks and spruce stairs. Thick-looking lower walls and a steep roof give the lodge a distinct shape even without a complicated interior.
- Build a stone base and lower wall band, with spruce posts and plank panels above. Put the entrance on a visible path rather than behind a snowbank.
- Use a gable roof and a sheltered front step. Keep the room well lit and preserve a clear route to the bed.
- Add a decorative stone chimney only after the shell is complete. A flameless fireplace alcove is the easiest beginner choice near wooden walls.
Make it your own: add a separate wood-storage lean-to. Minecraft's ordinary snow biomes do not create a general indoor heating requirement; the lodge's cozy appearance is a design choice, not a temperature mechanic.
19. The bamboo bungalow
Best for: a light tropical-style home once you have bamboo. Outside footprint: 7×9, plus an optional front porch. Palette: bamboo planks, bamboo mosaic, bamboo stairs or slabs and contrasting logs. Keep mosaic for a floor or accent panel so its pattern stays readable.
- Build a log-framed rectangular shell and fill it with bamboo plank walls. Use an ordinary solid floor rather than leaving gaps under a decorative raised platform.
- Add a broad shallow roof and a shaded porch. Frame the windows with your contrasting wood instead of introducing another bright palette.
- Put crafting and storage along the back wall and leave the front room open. Add bamboo plants outside without blocking the entry or window views.
Make it your own: use mosaic in a small central floor panel. Bamboo wood building blocks need 1.20 or newer; ordinary bamboo plants alone do not give an older game version the full plank-and-stair building set.
20. The mud-brick cottage
Best for: an earthy survival home with farm-friendly materials. Outside footprint: 7×9. Palette: mud bricks, mud-brick stairs, oak or spruce logs and planks. The warm brick texture suits a simple cottage or rural workshop without relying on rare decorative blocks.
- Gather or make mud, combine mud with wheat to make packed mud, then craft packed mud into mud bricks. Prepare the building blocks before starting the shell.
- Build log-framed mud-brick walls and a simple roof. Reserve wood for the door surround and window trim so the facade has a clear frame.
- Put a small farm or garden beside the cottage and keep muddy landscaping separate from your indoor floor. Use chests or barrels for a straightforward interior.
Make it your own: add a low wall around the garden. Mud bricks need 1.19 or newer. The Minecraft Wiki mud page explains making mud with water bottles, while its mud-brick page documents the building-block recipes.
21. The beginner modern box house
Best for: a clean modern look without a mansion-sized project. Outside footprint: 9×9. Palette: stone, light planks or white concrete, dark wood and glass. White concrete is optional; birch and stone make an easier early-survival alternative to collecting dye, sand and gravel.
- Build a rectangular room with a three-block-high interior and a flat roof. Choose one wall for a wider window and another for uninterrupted storage.
- Extend a thin roof edge above the entrance and use dark wood around the door or a single window panel. Keep other trim minimal.
- Arrange the furniture as a compact open-plan room. Use a short stone path and a simple rectangular planter outside.
Make it your own: add a small offset upper room later rather than a huge second story now. Try the Modern House Generator for more palettes, or learn the material process in our concrete guide.
22. The easy L-shaped home
Best for: separating sleeping and crafting without using stairs. Overall bounding footprint: 11×11, formed from two joined 7×7 squares with a 3×3 overlap at one corner. Palette: one wood type, matching logs and a contrasting roof. The inside corner naturally creates room for a sheltered entrance or patio.
- Mark both squares on the ground and remove the dividing walls where they overlap. Check that the join provides a walkable connection rather than two rooms touching at a single block.
- Build a shared wall shell and use simple flat or low slab roofs for your first attempt. Intersecting gables can wait until you are comfortable with the shape.
- Put the bed in one wing and storage and crafting in the other. Use the inner corner outside as the entry garden.
Make it your own: repeat window sizes and wall posts across both wings. Draw the union in the House Planner first; the bounding square is not the same as a fully filled 11×11 floor.
23. The mini watchtower house
Best for: a compact landmark beside a village or road. Outside footprint: 7×7, with two small enclosed levels and an optional viewing platform. Palette: cobblestone, logs, planks and fences. A tower uses height rather than a wide plot, but it still needs practical access between floors.
- Build the lower room with a reinforced-looking stone base. Put storage and crafting downstairs and reserve a ladder column before adding the ceiling.
- Build a second room with enough height to stand and move. Place the bed upstairs and close the ladder opening safely with a usable access arrangement.
- Finish with a small roof or fenced lookout. Light every level and protect exposed edges; the tower is a viewpoint, not an automatic defense against all mobs.
Make it your own: hang a personal design from the free Banner Generator near the entrance. A matching road sign and short path turn the tower into a useful navigation landmark.
24. The hobbit-style hill house
Best for: a cozy base that blends into the landscape. Interior target: 7×7 with a three-block-high ceiling, cut into a broad hill. Palette: oak or spruce, stone trim, grass blocks and glass. This builds on the simple hillside shelter but gives the entrance a rounded-looking frame and a more finished interior.
- Excavate a room while leaving a solid ceiling and checking for nearby caves. Replace rough interior surfaces with a consistent floor and wall palette.
- Build a stepped arch around a standard rectangular door: widen the lower frame and step the upper trim inward. The round look comes from the surrounding blocks, not a special circular door.
- Add small front windows, a path and flowers. Keep the bed and storage away from any unfinished excavation routes.
Make it your own: add a second room deeper into the hill or a small chimney-shaped ornament outside. Maintain a solid, lit enclosure; grass on top is decoration, not a substitute for checking openings into caves.
25. The starter home with a greenhouse
Best for: a practical cottage with an attractive side extension. Main house footprint: 7×9; separate attached greenhouse footprint: 5×7. Palette: oak or spruce, glass, matching stairs and stone for the base. Finish the home first, then build the transparent extension when you have enough glass.
- Build a standard cottage and reserve a side doorway for the greenhouse. Keep ordinary storage and the bed inside the main house.
- Add a log-framed 5×7 extension with glass walls and a simple glass or slab roof. Leave a central path and crop beds at the sides.
- Provide water and sufficient crop lighting, then connect the room through the reserved doorway. Keep torches and other lights clear of the walking route.
Make it your own: add a flower shelf or a small entrance bench. A greenhouse is an attractive enclosure, not a built-in growth-rate bonus; crops still follow their normal light, water and growth mechanics. Use the Minecraft Wiki farming guide when planning productive beds.
An exact starting shell: the 7×7 cottage before decoration
If estimates make you nervous, count a plain shell first. For a 7×7 square with one-block-thick walls, a full 7×7 floor takes 49 blocks. The wall perimeter contains 24 positions; three full wall courses take 72 blocks before you remove openings. A one-block-wide, two-block-high doorway removes two wall blocks, leaving 70 wall blocks. These counts assume no windows, no log substitutions and a floor layer separate from the walls.
A flat roof that projects one block beyond every wall covers a 9×9 area, so one complete slab layer takes 81 slabs. That is a simple temporary roof option, not the gable roof described in idea 1. Crafting recipes can produce spare pieces, so count output batches separately from placed blocks. Windows, corner logs, stairs, a chimney and a porch all change your bill of materials; there is no single exact total for every decorated 7×7 cottage.
- Plain floor: 49 blocks for a complete 7×7 layer.
- Plain walls: 70 blocks after a two-block door opening, before adding windows or replacing corners with logs.
- Temporary overhanging flat roof: 81 slabs for one 9×9 layer.
- Furniture and fittings: one door, one bed, one crafting table, one furnace, storage and lighting counted separately.
Three easy roof styles that improve almost any starter house
Gable roof: the dependable cottage choice
A gable has two slopes meeting at a ridge, with triangular walls at the ends. Start matching stair rows at the two side walls, move inward as you climb and fill the end triangles after the slopes line up. An odd-width house makes a centered ridge easier to plan. One-block eaves create depth without widening the interior.
Flat slab roof: the quickest clean finish
A slab roof suits tiny homes, desert houses and modern boxes. Keep the edge level and use a modest overhang. Bottom slabs are useful for reducing spawnable surfaces, but mixed full blocks, top slabs and nearby ledges can still need attention; inspect the completed build instead of assuming every slab arrangement is safe.
Lean-to roof: the simplest extension
A lean-to slopes in one direction and attaches well to a storage porch or greenhouse. Make the wall beside the main house higher than the outer edge, then step the roof down in consistent rows. Keep the low edge high enough to walk under. Use the Roof Designer to plan a style before you commit your stairs and slabs; the Minecraft Wiki roof guide gives further examples of roof shapes.
Survival safety, lighting and mistakes to avoid
A good starter home is an enclosed, lit room with a clear entrance, not simply an attractive roof. For many ordinary Overworld hostile mobs in modern versions, natural spawning requires block light level 0. That is not a rule for every creature or spawning system: spawners and special mobs can have different conditions. The Minecraft Wiki light reference documents the distinctions. Check the interior, yard, roof and access paths, and do not rely on daylight to reveal every dark corner.
- Do not build the shell before testing the interior. Reserve space for the bed, chest lids and stairs on the floor plan.
- Do not assume a wooden door guarantees safety in every difficulty. Some zombies can break wooden doors on Hard difficulty; use an appropriate entrance setup for your world.
- Do not place exposed fire beside a wooden house. Decorative stone fireplaces without fire are the simplest option while learning safe construction.
- Do not let leaves, slopes or decorative steps create an unintended route over your yard boundary. A fence is only useful when the surrounding layout supports it.
- Do not start with five rare palettes. Finish a useful oak or stone house first, then swap accent blocks after exploration.
- Do not add a second floor without planning the stairs and headroom. A bigger single room is often more useful than two cramped levels.
Set up a bed once you have the materials, use it when sleeping is possible, and note your base coordinates for travel. Our bed guide covers crafting. This article assumes a normal Overworld home: beds behave dangerously in the Nether and End, so do not transfer the sleeping advice to those dimensions.
How to make a simple house look finished without rare blocks
Work from the largest shape to the smallest detail. First, fix the silhouette with a consistent roof and overhang. Second, add contrast with corner posts and a base band. Third, frame the entrance and connect it to a path. Finally, add a small amount of greenery. A few repeated details usually look more coherent than a wall covered in every stair, fence and trapdoor you own.
- Use a three-material palette: main walls, frame and roof. Introduce a fourth only for a small accent.
- Align windows with the interior. Symmetry is useful on the front, but a storage wall does not need a window just to match the opposite side.
- Repeat porch supports and window trim. Consistency makes even a simple rectangle feel designed.
- Add a path that reaches somewhere useful: your farm, mine, dock or village. Landscaping should connect the build to its surroundings.
- Finish one small garden rather than outlining a huge empty yard. Leave expansion space, but do not decorate every spare block immediately.
Turn an idea into your own Minecraft house plan
Pick the idea that matches your actual resources, not just the fanciest screenshot. Use the House Planner to mark the outside walls, doorway, bed and storage. Compare roof shapes in the Roof Designer, then lay a temporary outline in your world. If the room feels tight during that walk-through, change the dimensions before gathering decorative blocks.
For more inspiration, try the Modern House Generator or browse the tool directory. Keep the first build manageable: finish the shelter, add food and storage, then improve the silhouette. A small home you can use today is a better starter base than a spectacular foundation you never finish.
Sources and scope
The 25 house layouts are editorial design suggestions, not verified in-game schematics or exact block-by-block downloads. For underlying mechanics and materials, see the Minecraft Wiki shelter tutorial, roof tutorial, light reference, cherry reference, bamboo block reference, mud-brick reference and crop farming tutorial. These sources explain game behavior; they do not endorse MineBuildr or validate the specific layouts above. Ordinary block placement works across Java and Bedrock, but check your version, difficulty and server rules before choosing a palette or safety setup.